Professional Lip Blush Artists Vancouver: 2026 Guide
Table of Contents
- What Sets Professional Lip Blush Artists Vancouver Apart
- How to Evaluate Lip Blush Artists Vancouver: A Comparison Framework
- Lip Blush Before and After: What Results to Expect
- The Lip Blush Healing Process: Week by Week
- Lip Blush Aftercare: Protecting Your Investment
- Lip Blush Cost: What Affects Pricing
- Dark Lip Neutralization and Colour Selection
- Conclusion
- Frequently Asked Questions
Last Updated: October 14, 2026
What Sets Professional Lip Blush Artists Vancouver Apart
Professional lip blush artists Vancouver clients trust bring more than a steady hand and a good color palette. At Wink Ink Studios, the difference between a result you love for years and one you regret comes down to training, sanitation, and consultation discipline.
Two things separate the best artists from the rest: verifiable certification and a consultation that adapts to your skin tone and natural lip pigmentation rather than applying a one-size-fits-all colour.
Credentials and Safety Standards
Certification matters more than follower count. In British Columbia, cosmetic tattoo artists should hold bloodborne pathogen training and follow regional health authority guidelines for personal service establishments, including single-use needles, sterile pigment cups, and proper skin preparation.
When you evaluate an artist, ask directly:
- Which certifying body issued their permanent makeup training?
- Do they hold current bloodborne pathogen and infection control certification?
- Can they walk you through their sanitation protocol step by step?
An artist who hesitates on any of these is not the artist for you. Health Canada regulates the pigments and devices used in cosmetic tattooing, so a professional artist should be able to tell you which pigment lines they use and why. Health Canada guidance on cosmetic tattooing and tattoo inks
How to Evaluate Lip Blush Artists Vancouver: A Comparison Framework
Most people choosing among professional lip blush artists in this market compare Instagram grids, which tell you almost nothing about healed results, safety, or total cost. Fill in the framework below with verified details from each artist's website, consultation, or written quote, not from memory or vibes.
Step 1: Build a Shortlist of Three to Five Artists
Start with artists who meet a minimum bar:
- They publicly list their permanent makeup training and certifying body.
- They hold current bloodborne pathogen and infection control certification.
- They show healed photos (four to six weeks post-touch-up), not just fresh work.
If an artist fails any of these, remove them from the shortlist. Depth of comparison only matters among artists who clear the safety and training bar.
Step 2: Score Each Artist on the Criteria That Actually Change Your Outcome
Use the same five criteria for every artist so the comparison is apples to apples. Rate each from 1 to 5, then weight by what matters most to you.
| Criteria | What a 5 Looks Like | What a 1 Looks Like | Suggested Weight |
|---|---|---|---|
| Certification and sanitation | Named certifying body, current BBP certification, insurance confirmed in writing | Vague "certified" claim, no documentation offered | High |
| Healed portfolio depth | 4-6 week healed photos across multiple skin tones and lip pigmentations | Only same-day or heavily filtered photos | High |
| Consultation process | Patch test offered, colour mixed for your undertone, suitability screening, cold sore history asked | Colour chosen from a chart in under five minutes | High |
| Pricing transparency | Written quote covering initial session, touch-up, and aftercare products | Headline price only, touch-up billed separately and undisclosed | Medium |
| Aftercare and follow-up access | Written plan, direct contact for concerns, defined touch-up window | Verbal instructions only, no follow-up channel | Medium |
Multiply each score by its weight, add the totals, and rank the artists. This forces you to compare what determines whether you love the result in six months, not what photographs well on day one.
Step 3: Verify the Details That Are Easy to Fake
A few claims are worth confirming directly:
- Healed photos: Ask when the photo was taken relative to the touch-up. A healed result is judged four to six weeks after the touch-up, not after the initial session.
- Certification: Ask which body issued the training certificate and whether the BBP certification is current. Certifications expire, and "trained in 2019" is not "currently certified."
- Pigment lines: Ask which pigment brands the artist uses and whether they can explain why those lines suit different undertones. Health Canada regulates the pigments and devices used in cosmetic tattooing, so a professional should be able to speak to this. Health Canada guidance on cosmetic tattooing and tattoo inks
Step 4: Compare Total Cost, Not Headline Price
The number that matters is the all-in cost of a finished result: initial session plus touch-up plus aftercare products plus the realistic number of sessions for your lip tone. A lower initial price that excludes the touch-up is often more expensive than a higher bundled price, so rank artists on the same basis.
Step 5: Book a Consultation Before You Commit
A consultation is the cheapest way to test an artist. Pay attention to whether they ask about your cold sore history, skin undertone, natural lip pigmentation, and expectations. An artist who listens and adjusts their plan beats one who quotes a fixed colour before seeing your lips.
Lip Blush Before and After: What Results to Expect
Realistic expectations start with understanding that lip blush is a soft tint, not opaque lipstick.
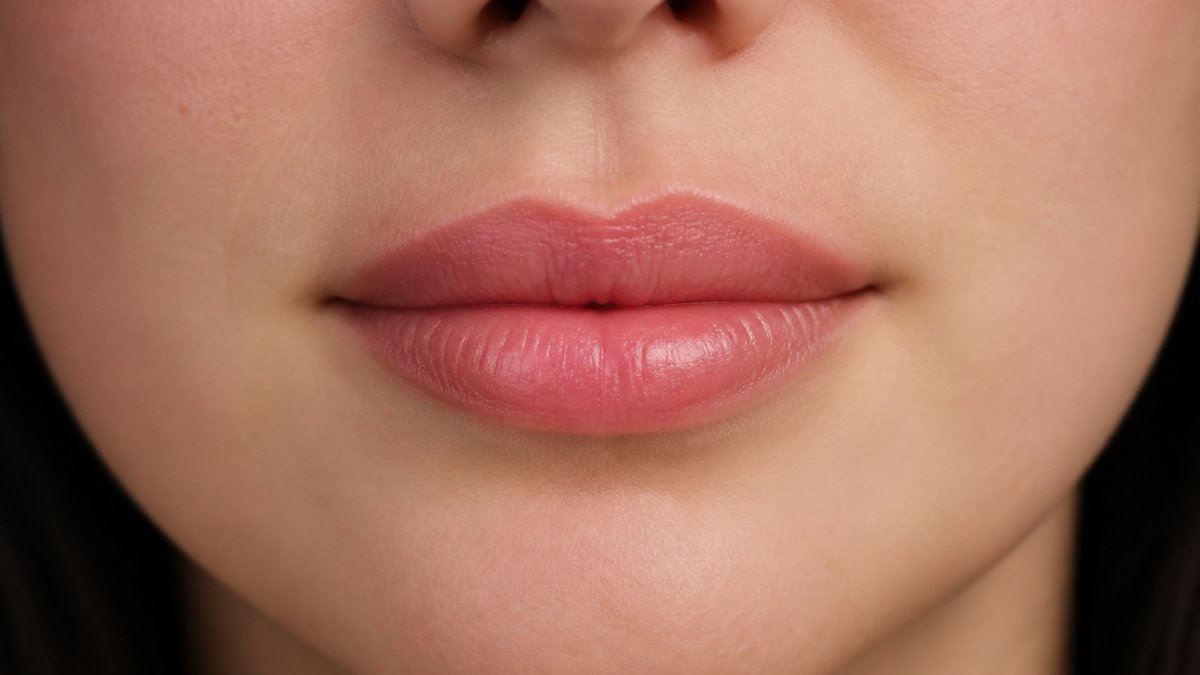
Results vary by skin tone and natural lip pigmentation. Clients with fair skin and pale lips often see the most dramatic change; clients with deeper natural lip tone typically need dark lip neutralization first, which adds a session.
The Lip Blush Healing Process: Week by Week
The lip blush healing process follows a predictable timeline, though exact timing varies by individual. Knowing what to expect each week prevents misreading normal healing as a problem.
- Days 1 to 2: Lips feel swollen and tender. Colour looks bold and glossy. Cold compress and gentle hydration help.
- Days 3 to 5: Swelling subsides. Lips begin to feel dry and may start to flake. Colour darkens slightly before it lightens.
- Days 6 to 10: Peeling phase. Do not pick or scratch. Pigment appears patchy, which is normal.
Lip Blush Aftercare: Protecting Your Investment
Lip blush aftercare determines how well your pigment retains, and the first two weeks matter most. Keep lips moisturized with the balm your artist provides, avoid direct sun exposure, skip spicy and acidic foods, and keep makeup and skincare actives off the treated area until it has fully healed.
Avoid these during healing:
- Picking or exfoliating the peeling skin
- Sunbeds, saunas, and swimming pools
- Lip products containing acids, retinoids, or exfoliants
Long-term, daily SPF on the lips and a quality lip balm extend colour retention. Most clients book a touch-up at four to six weeks, then refresh every 18 to 36 months depending on lifestyle and sun exposure.
Lip Blush Cost: What Affects Pricing
Lip blush pricing in this market is not a single number, and any artist who quotes a flat rate before seeing your lips is guessing. Compare cost by understanding what drives the price, then comparing the all-in figure for a finished result.
The Cost Drivers
Artist experience and specialization. An artist who has performed hundreds of lip procedures and specializes in lip work typically charges more than a generalist.
Whether the touch-up is bundled. This is the single biggest variable in true cost.
Studio overhead and location. Rent, equipment, and staffing costs vary by studio and are reflected in pricing.
Aftercare products. Some artists include a healing balm and written aftercare kit; others sell these separately. Factor this into the comparison.
How to Compare Quotes Fairly
Ask every artist the same five questions:
- What is the total cost of the initial session?
- Is the touch-up included, and if not, what does it cost?
- How many sessions will I likely need given my natural lip tone?
- Are aftercare products included?
- What is the policy if a third session is needed?
Add the answers into a single all-in figure per artist. That number, not the headline rate, is what you are comparing.
What a Written Quote Should Include
A professional quote should state the initial session cost, the touch-up cost or confirmation it is bundled, the expected number of sessions, aftercare products included, and booking and cancellation terms. If any are missing, ask before you pay a deposit.
Consumer Protection Basics
Service contracts for cosmetic procedures are governed by consumer protection rules, and you have the right to clear terms before you pay. If a studio will not provide a written quote or explain its touch-up and cancellation policy, that is a signal to look elsewhere. Consumer protection guidance on service contracts from the Competition Bureau
Long-Term Cost of Ownership
Lip blush is not a one-time purchase. Plan for a touch-up four to six weeks after the initial session, then a refresh every 18 to 36 months depending on lifestyle, sun exposure, and how your skin retains pigment.
Dark Lip Neutralization and Colour Selection
Dark lip neutralization is a corrective technique for clients with hyperpigmented, cool-toned, or uneven natural lips. Instead of adding colour on top, the artist first neutralizes the underlying tone, then builds the target colour in subsequent sessions.
Colour selection is where consultation skill shows. A professional artist assesses your natural lip colour, skin undertone, and how your skin heals pigment before mixing anything, because pigment behaves differently on cool, warm, and neutral undertones.
Conclusion
Choosing among professional lip blush artists Vancouver offers means looking past the highlight reel and evaluating certification, healed results, and consultation depth.
At Wink Ink Studios, Valerie is a certified permanent makeup and lash artist who builds every lip blush plan around your unique face shape, skin tone, and lifestyle.
Get started with Wink Ink Studios and wake up to natural-looking, effortless results every day.
Frequently Asked Questions
How much should lip blushing cost?
Pricing for lip blush varies based on artist experience, studio location, and whether a touch-up is included. In the Vancouver area, rates typically reflect the artist's certification level and the complexity of your colour correction needs. Rather than quoting a fixed number, most professional artists provide a personalized quote after consultation. Wink Ink Studios recommends contacting the studio directly for current pricing and package details, as costs can change based on your specific lip tone and desired outcome.
How long does lip blush healing take?
The lip blush healing process unfolds over roughly two to four weeks. Days one through three bring swelling and intense colour. Days four through seven involve peeling and flaking as the surface heals. Weeks two through four show the colour settling into its final tone. A touch-up appointment at four to six weeks refines shape and saturation. Following lip blush aftercare instructions, such as avoiding spicy foods and keeping lips moisturized, directly affects how well the pigment retains.
How do you choose a qualified lip blush artist?
Look for certification in permanent makeup, a portfolio showing healed results across different skin tones, and strict sanitation practices. Ask about the artist's training, how they handle colour selection for your natural lip tone, and whether they offer a consultation before booking. A professional lip blush artist Vancouver clients trust will explain the lip blush healing process, provide written aftercare instructions, and show before and after photos of real clients. Verify the studio uses single-use needles and follows regional health guidelines.
Does lip blush require a touch-up?
Yes, a touch-up appointment four to six weeks after the initial session is typically recommended. This follow-up refines colour retention, fills any gaps, and adjusts the shape if needed. Without a touch-up, results may fade unevenly, especially for clients with darker natural lip pigmentation or those who smoke. The touch-up is part of the standard lip blush cost at many studios, though some artists charge separately. Confirm touch-up policies before booking.